Showing posts with label The Historical Sew Fortnightly Challenge. Show all posts

Sunday, February 9, 2014

A Panoply of Monthly Regrets Featuring Beatrice the Advice Chicken


So...

Yeah.

Six Seven months without a post!

Depending on your individual thoughts on the matter, this was either a really awesome break from what had become an endurance test of the highest order, or my absence was an emotional and spiritual trial which awakened thoughts of loneliness and despair otherwise known only to death row inmates and readers of Janet Evanovich's last three books. (Seriously, Janet... just stop.)

As usual, readership increased during my time away from the blog. I hope that my renewed presence does not turn away any of these fledgling followers. This blog, much like your parent's closet, is best explored when nobody's at home. But fear not! I will almost assuredly disappear for another 3, 6, or 22 months at some point in the future, and the timid may resume readership then.

It has been my experience that, when a blog writer disappears for a long stretch of time, the return is seasoned with Epic Life News and Developments. Just to be as clear and boring as possible, I have not:

Become married.
Become separated.
Become with Child.
Become the owner of a new and spectacular home.
Developed a legitimate sense of humor. (sorry, kids.)


However, I haven't been completely lazy!!*

* This is mostly a lie.

For those intrepid masochists who have made it this far, enjoy a brisk biannual re-cap of the past seven months! At least, what I can remember of it. To fill in the gaps in the saga, today's post will be liberally peppered with commentary from Beatrice, the Disapproving Advice Chicken.

"This post is much too long and picture heavy. You're going to alienate everyone except the shut-ins."
Yes, Beatrice. You're right. But I really don't want to create separate posts.


July boasted a trip out to the annual Revolutionary War reenactment at a local historic site, which in turn required me to stay up all night sewing things that I ended up not wearing.

I regret that I have but one bitch-face to give for my country.

School started back in August, and with it came the realization that I riddy riddy needed to get a little more motivated on that uniform project. This also represents the moment at which I declared defeat on any realistic participation in the Historical Sew Fortnightly Challenge, 2013. (A moment of silence please, for my good intentions.)

Why, HELLO antique original shirt-waist! So nice of you to provide a pattern!

September brought a new series of adventures. First, a childhood friend (and virtually the only person that I knew in High School that I still have any meaningful contact with) got hitched. I was a bridesmaid, and enjoyed my be-ruffled ambiguously purple-colored dress duties to the fullest.

Mistakes were made, though.

RED RUM

This is an un-retouched picture of the color I somehow managed to dye my hair in September. It's a shade of red usually seen only on the surface of the sun. It matched my acne beautifully, so there's the silver lining in that little cloud. Luckily, I managed to tame the beast a few weeks later with another box of goodness from the grocery store beauty aisle. (Or as I like to call it, "The Promenade of Self-Esteem Roulette".)

"You shouldn't buy discontinued hair dye from the clearance bin at Bi-Lo."
Thank you, Beatrice. I'll keep that in mind.

October holds a special place in my heart. This year was no different:

 Assorted facial mucus + non-insulated floors + dress pattern = Happy 32nd Birthday to ME!

This was also the last full month of sewing before the project was due. I finally hit my stride around the third week. Meanwhile, my nephew leveled up to a whole new echelon of awesome:

The Indian Maiden is bowing her head and weeping on behalf of my Sister-in-law's home decor. 

The fresh killing fields of November were finally upon me. In celebration, I spent FOUR DAYS STRAIGHT sewing without sleep. 

Four.
Days.
Straight.


Lest you think (as I did) that "four days without sleep" is comparable to "that week of finals in 2010 when I only got like, 6 hours of sleep total over the course of 5 days and I thought I was gonna die", think again. Going without any sleep at all for more than a day or two is pretty stupid, if you have a choice in the matter. Four days is just plain insane. Please take this as a public service announcement from your Friendly Neighborhood ThreadHead: Don't procrastinate on a project to the point that such things are even within your scope of consideration. 

But, the project went up and life went on. (I'll do a project post soon. Too much to cram into this little jewel.)

The day after I installed the uniform project, I went to the Northern Carolina and spent a few days with my mother as she recovered from surgery. As soon as she was able to get around a little, I went home and jumped into finishing the school semester. In the process, I got my first "B" of graduate school.

I really, really want to whine about that. Really. But I absolutely deserved it. Sigh.

"You should have spent more time proof reading that final paper on Runaway Slave Advertisements instead of shopping for Korean cosmetics."
Thank you, Advice Chicken. But you're a little late.

December was calming. The semester was finished, the uniform project was well-received, and I finally started to re-establish normal sleep patterns. It was unseasonably warm all Winter here in Carolina-South, but we had a lot of these to make up for the snow:


Which is totally boss.

Side note! This is what the Manly Person and I made for his dad for Christmas to aid in the ongoing war against Belligerent Free-Loading Deer:

I'm looking for a few Scare-Hoes to liven up nights near the muscadine vines... pls txt.

January brought several awesome things this year. I was invited by my guy's mother to attend the MESDA seminar on textiles this year, so I began the month with a trip to Charleston with her. We got a dusting of snow in the middle of the month (and possibly another in a few days! Hurray!) and the new semester began. I've officially started my thesis, but I'm also taking an independent study in weaving. I've always wanted to learn to weave. Studying 18th century weave structures is so much more rewarding when you can relate to the method of manufacture. I have a lot to learn, but it has been pure joy so far. 

Modified Basket-Weave!

I wish I could say that February has been as good, but I can't. It has been pretty tough. My constant companion and Thread-Head mascot, BatMan, is unwell. After a lethargic week followed by a day of ignoring his food, I took the Bat-Cat to the vet. Diagnosis is advanced renal failure, which means that I'm going to lose my buddy a lot sooner than I ever imagined. He was at the vet clinic several days last week, and came home yesterday evening. He goes back tomorrow for another blood test. Pretty much anything that we do for him at this point is palliative care.

I haven't been given any reason to expect a miracle, but that doesn't stop me from hoping. He's a good cat. The best. And it breaks my heart to think of what may come.

 The Noble Beast, in repose.


And there you have it. The ongoing story of Alison, Were-Hag of the Southern Colonies will continue, despite the fervent prayers of some of my readers. As soon as I can motivate myself, I intend to sneak a few expository posts into the dead-air of the past months. In the meantime, thanks for checking in and Happy 2014 to my Bloggy peeps. You have been missed.

"That burning smell means that it's time to turn dinner over and cook the other side."
Yes, Beatri.... AAAGGHHHH!!!!!

Monday, July 15, 2013

Dressed to Frill!

After a prolonged bout of whining, I finally managed to compel my long-suffering Manly Person to take a few pictures of the Regency dress that I made for the Historical Sew Fortnightly Challenge # 6. Due to a book signing at work, the annual Mullet and Bullet festival at my favorite local historical site, and this photo-shoot, I've spent three of the past four days in historic dress.

Him: "What exactly are we going for?"
Me: "Pretend like this turns you on."

My inner nerd rejoices. Oh, how she rejoices.

But!!! In addition to pandering to my (undoubtedly) salivating public with soft-focus pictures of myself in Regency drag, I wanted to show off a new piece in my reenactrix arsenal: My frilled collar!


I've blogged about the dress and bonnet before, but haven't had a chance to mention the frill. Here's the scoop: As evidenced by my occasional posts lauding American Duchess (and others), I'm keen on supporting talented, entrepreneurial folks in the historic costuming blogosphere. I purchased this frilled collar from Cassidy at A Most Beguiling Accomplishment a few months ago, and I am so glad that I did! Relentless optimism has its place (in online dating and while eating at restaurants with "B" sanitation grades, for instance), and I'm usually all for trying something that's beyond my skill grade before relenting and sourcing it elsewhere. But, I could not have produced a piece like this. It's exquisitely made, and fits under my modest collection of Regency-wear perfectly.


Cassidy's Etsy shop is called "La Petite Oye". She sells manchettes, collars, and chemisettes (among other things), all of which are made by hand and based on items she has researched. Allow me to repeat that: This is entirely hand-sewn. None of that "visible seams are hand-finished" business. That's classy.


Now, if only I could find an equally unimpeachable source for Regency hairstyling tips for use in 9000% humidity. Seriously... not even a pint of Aqua Net with a dry shampoo shooter can keep a curl crispy in this mess. Just one of the many perks of a day well spent in the hillbilly-scented sauna of South Carolina.

Tuesday, July 2, 2013

A picture of my cat in a bonnet? YOU GOT IT!!


A long time ago, when the earth was still cooling, and I was still participating in the Historical Sew Fortnightly Challenge, I made this here bonnet:

Lots of hand-modeling in this episode. Enjoy. 

Well, sort of. The grim reality is that I purchased the bonnet from the nice people at Austentation, admired its braided nude straw goodness for about a month, and then slapped some seasonally indifferent flowers upon it.

And here's how!!

All great projects start with a plan. In my case, I planned to go to bed early one night and instead ended up drunk on Etsy searching for things like "STRAW BONNET REGENCY BONNET REENACTOR FORM STRAW." That led me to Austentation's Etsy shop (the link is to their website), and eventually to the fine piece of millinery you see above. Once I had the bonnet in hand, I sought out inspiration. As you can imagine, there is NO lack of 200-year old bad bonnet ideas.


Courtesy of Nuranar, who haunts my dreams AND my blog. I promise... the purple ruffle monster is not forgotten!


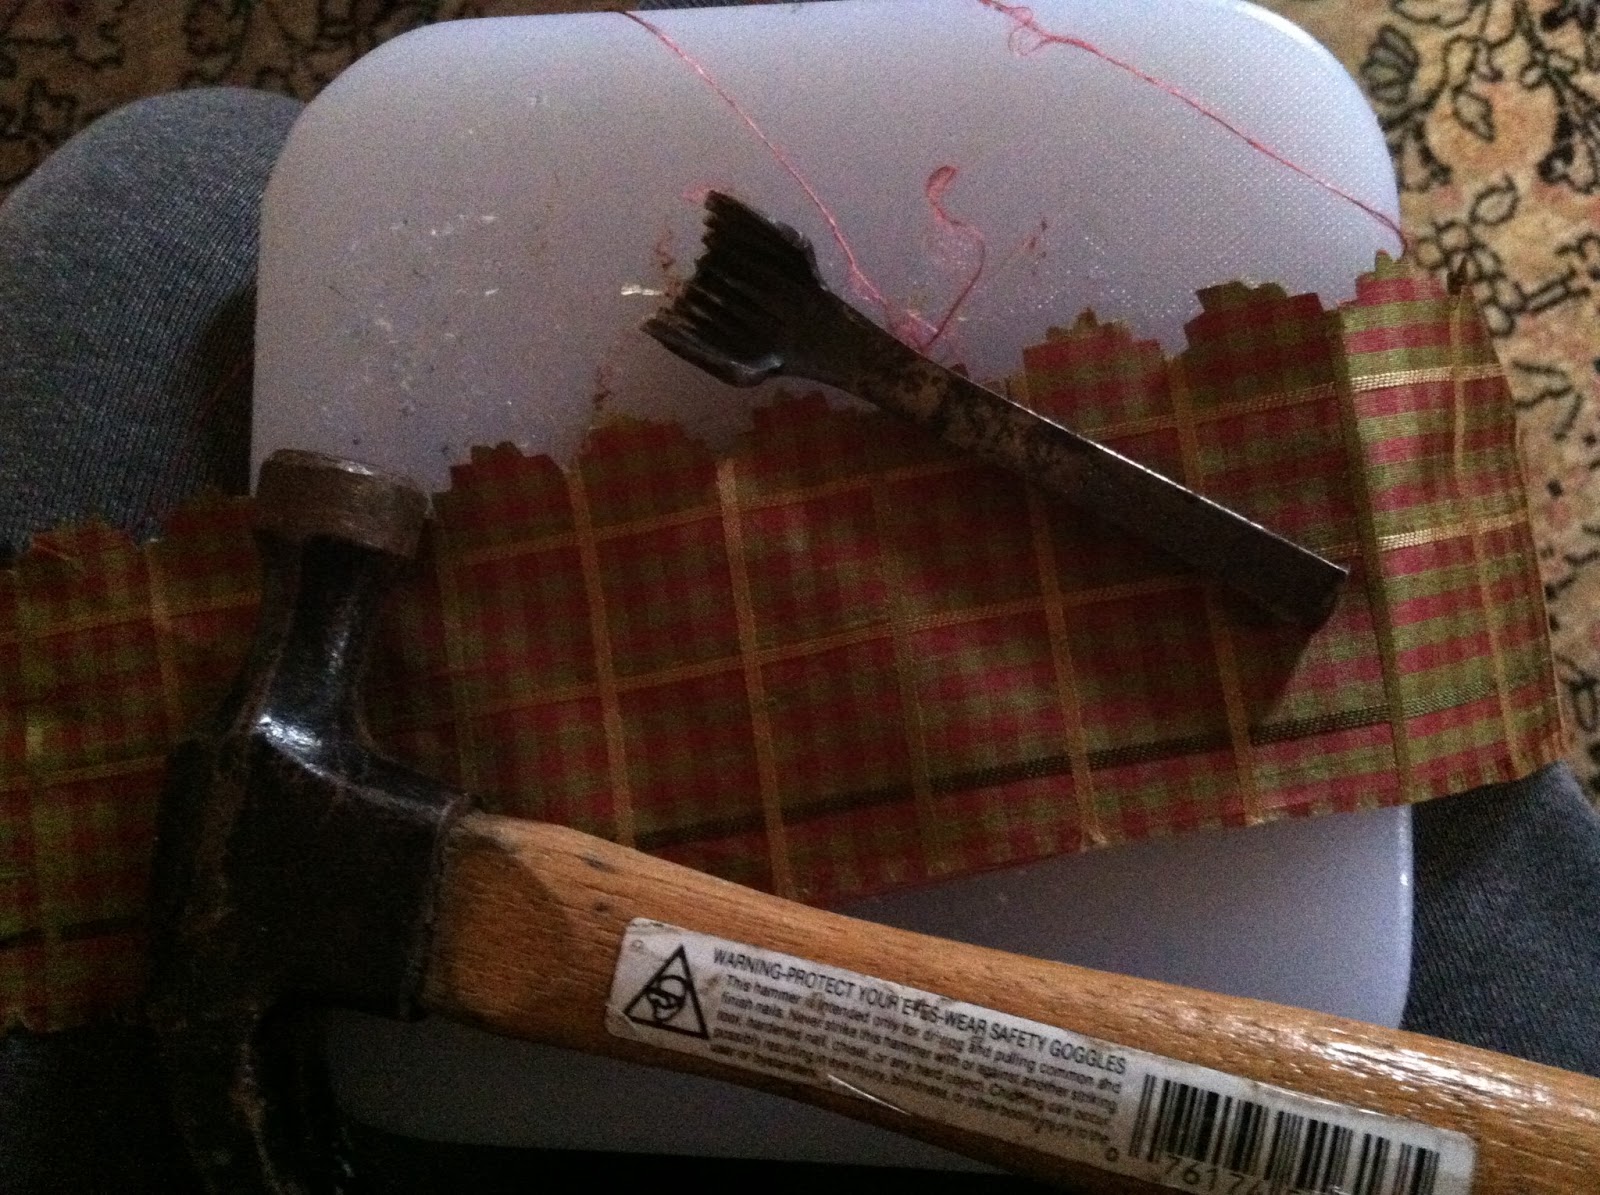
The relative simplicity of the plaid-trimmed number appealed to me, (sandwiched as it is between what appear to be lampshades embellished with adult diapers). But where does a girl find scalloped plaid silk ribbon in this crazy, crazy world?? Oh, yeah...

Using only a hammer, pinking iron and the power of my opposable thumbs, I violently carefully beautified the edges of some scrap silk taffeta that I'd previously cut into strips.


And then played around with them, singly and in layers, until I liked the effect. Everything was tacked onto the bonnet with brown cotton thread and my largest blunt needle. (It takes a while, but I can learn!)


I acquired the poppies for this bonnet from H*bby L*bby, but the rest of the bodacious floral bounty is left over from other projects. The flowers were sewn down by their stems, one at a time. Each stem is wrapped around at least one other flower before being attached. I tell myself that this is to ensure stability and strength, but in all honesty, it just made the sewing easier. (No more roly-poly stem chasing!)


Yes, the poppies look sad. You'd look sad too if you had to ride around on my head.

Sooo.... who wants to help me create a South Carolina chapter of the Regency Society?? Seriously, I have NOWHERE TO WEAR THIS STUFF. It's pathetic. No War of 1812 Battle Reenactments, no Regency Fairs (or Faires or Fayres), no nuttin'. Perhaps it's finally time to post an advertisement in the local paper and reach out to my fellow costuming nutcases.

 Or maybe I'll just stick with my current occupation of eating drugstore chocolate and writing to strangers on the internet. 

Yeah... that sounds like a solid plan.


The Challenge: #7: Accessorize!
Fabric: Scraps of pink plaid silk taffeta left over from... you guessed it! The Jehossee Project. 
Pattern: NEVER!!!!
Year: 1812ish
Notions: Assorted faux-floral odds and bits, thread, and silk remnant masquerading as ribbons.
How historically accurate is it? Aside from the questionable flower content, not bad. 
Hours to complete: 4
First worn: By my cat. 
Total cost: $30 for bonnet; $6.00 for flowers
And, as promised:


Saturday, June 1, 2013

If Blogs were like children, the state would have taken mine away by now.

Awesomeness.

So these past two months of never, ever posting have been AMAZING. I wrote most of this post last month, when I'd only been absent from these hallowed grounds for about 3 weeks. Don't worry: It's been updated for additional pathos!  For everyone who is completely in thrall of my personal life, pray, read onward!

* I have had the most incredible combination of plagues. After toughing it out for a couple of weeks, I finally went to the doctor (much fanfare and fuss and all that). I was diagnosed with a sinus infection, acute bronchitis, and "a touch of pneumonia." Apparently, my doctor is a fan of nuance.

* Finals week happened, which was great except for the fact it lasted two weeks, not including the ever-excellent "Week Before Finals: Tournament of Badassery." (You know, that magical four day period before exams when EVERY SINGLE PROJECT IS DUE?) So that's three weeks of Academic Purgatory with a dose of Thread-Headed procrastination for the win!

* After worrying over it for a day, I decided to foster a stray cat that appeared at my work one night. After worrying over it for less than an evening, the cat decided to chew through a 60-year old steel screen and flee into the unknown night rather than spend another moment in my home. What can I say? I have a way with animals.

Sweet little tuxedo man outside of my store, before the jail-breaking at my house later that night. Please send good thoughts his way.

* In a fit of sleep deprivation-fueled insanity during the sickies, I found myself in the makeup aisle at Target where I bought a tube of red lipstick. This proved to be the exact same terrible idea that it has been the last 12 times that I bought a tube of red lipstick. Generally speaking, I look like a female. (Not bragging. I really sort of do.) Add an extra dash of eye makeup and some red lipstick? I look like a man in drag. Red lipstick #13 is now enjoying an ignominious burial in a purse I plan to never open again. **5.31.13 Update: I bought another tube of red lipstick. This one may be an improvement, because I look like a hooker now rather than a sexually confused lumberjack.

* I emerged from the chrysalis three weeks ago to check my email, whereupon I discovered that I was supposed to give a speech to some people on the following Tuesday (oops) about a museum exhibit I had to put up a week later (crap.) But it was okay because I had to give a presentation on that Friday, too. Different group of people, same disappointed glares. Gotta love it.

* Despite lacking coordination, motivation or any natural sense of joint articulation, I've decided to go "jogging" on my free mornings this Summer. This has resulted in every 10:00 a.m. Mommy Walker in the county protectively steering their strollers away from me as I "jog" down the path. I don't blame them. I managed to hit myself in the face twice on my first morning out, with my own hands. (In all fairness, I have it on good authority that I run like Jar Jar Binks.)

Here's your ticket to... the gun show. 
Also: that bottle of green food coloring has been there, along with his friend the solitary star candle, for at least 3 months. 

* Historical Sew Fortnightly Who? Yeah. I've been bad. Keeping up with the sew-a-thon was a good way of organizing my time. I really need to get back into it, with some alterations. Starting ASAP, I'm working on a research project for school. Southern Ladies' College uniforms c. 1895-1910, anyone?? Hopefully, the upcoming HSF challenges will include things like "Make A Nineteenth Century Woollen Suit Entirely Based On Two Grainy Photographs" and "Create Several Nearly-Identical Blouses With Gigot Sleeves Based On A Vague Student Handbook Reference."

And to wrap up the wall of belligerent rambling, I'm happy to report that my absence of two months has not gone unnoticed! I've gained 15 (undoubtedly loyal) readers since my last post. The secret to building a readership here at Ye Olde Snippet is apparently to avoid any and all forms of contact with you guys. For giving my fragile ego a much-needed boost, I say THANK YOU!

More lies and whimsy to come! Be back soon!

Sunday, March 24, 2013

Oh, Say Can't You Regency? HSF #6!

Welcome to the sixth installment of the Historical Sew Fortnightly Challenge: Stripes! I've made a Regency dress! If only I had a Homeschool Prom to attend whilst wearing it, my life could at last be complete. 

Instead, I'll be filling the void by sitting at home in my pretty stripedy frock as I drink wine from a box, write embittered late-night WTF: Regency posts and talk to my cat. It's what Jane Austen would have wanted, I'm sure of it.


It is a testimony to my lack of proper feminine instinct that I have failed to produce a Regency-style dress til now. Isn't there a clause somewhere in the government-issued booklet that girls receive at birth stating that you must read Emma by the age of 17 and then immediately afterward attempt to cobble together an empire-waist dress? Consider this gown to be yet another milestone in my own awkward, prolonged puberty. (Dammit, I'm not going to act like a grown-up until the acne goes away!)

This dress was constructed like everything else I make: with almost no foresight or planning, and very little skill. I draped the bodice onto Headless June using some bodacious crappity-scrappity fabric that I possess (sorry... no pictures of that), and adjusted the proportions and seam positions until it felt right.   For the most part, I relied on this dress for inspiration, though I omitted the back ties and drawstring, and my sleeves are shorter. (I stared at this one as well, but there aren't many pictures of the details.)

 Rebel that I am, I mixed up my stitchery a bit. The areas that are likely to experience the most stress (armpits, center back, etc.), I finished with a back-stitch. Everything else is in a spaced back-stitch. You can see the transition in the armscye above. 

The bodice is lined in cream cotton sateen, except for the bib. I used a scrap of the calico lining from my gold round-gown for that. The sleeves are mostly lined with muslin, but I used scraps of the striped fashion fabric for the first 4" or so of the bottom of the sleeve. The insides of the sleeves are not at all visible when the dress is on, but it seemed a reasonable precaution.


Since the inspiration gown has the nifty little inner bodice flaps, I did the same thing. I wanted mine to pin closed rather than tie, though. (I didn't want a drawstring in the bodice and the ties would have added lumpy weirdness under the flat, re-designed bib. LUMPY WEIRDNESS, I SAY!)  They are made of white cotton sateen and attached over the finished interior edge. I have no idea if what I did there is correct, but I sure as heck did it. They support my meager bust in addition to closing the sides of the dress. Brilliant!


The skirt is unlined. Honestly, if I were to make this dress again, I would line the skirt. The quilting cotton I used is just a little too thin to hang properly on its own. Hopefully, a period appropriate petticoat or two will help. The material of the skirt is pleated to a band and then enclosed between the bodice fashion fabric and lining. Per the original gown, the bulk of the skirt is pleated at the center back. (I'm making a little pillow that will be sewn under the pleats to support the back. They're hanging a little flat at the moment.)

 Why, hello there matching back stripes.

Regency gowns are generally constructed to play up the "small back" of the wearer. I pandered to this oft-quoted historical costuming trope by using the stripes to form a chevron pattern and inset the sleeves as far back as I could without over-reaching the limits of my own range of motion. There's a knack to setting these sleeves... a wide armscye will give you a much broader range of motion, but your sleeve has to have just enough bulk to allow your arm to take advantage of it. Otherwise, the tiny back/deep armscye combination restricts your arm movement considerably. Needless to say, I am still learning the ins and outs of this balancing act.

I purchased the fabric for this dress over three years ago during an epic Hanc*ck Fabrics sale at my local store. This was a remnant on a bolt with a generous 50" selvedge. That is a critical factor for the following reason: this dress is made with barely 3 yards of fabric. That may not impress some of you delicate, precious creatures out there with your tiny feet and non-monstrous legs and arms. But my Sasquatch-esque extremities usually command more prodigious yardages.


I want pictures! Soon! It unexpectedly rained today, so my resident photographer went out to get groceries. The dress is considerably shorter on me than it is on Headless June, so it will look a bit different. I don't have proper undergarments yet for this era, though I do have a pair of busked c. 1820-1840 mock-up stays I've made for the Flora and Fauna challenge. They were used for most of the fitting.

And that concludes this episode of Thread-Head Theatre. Except for the paperwork! Read on!

 Attack of the Facts:


The Challenge: #6: Stripes!
Fabric: 3-ish yards of reproduction quilter's cotton. (Labeled "1830-1860," but I think it looks a lot like an early roller-print. Maybe that's wishful thinking.)
Pattern: Draped directly onto Headless June as a mock-up in Grandma's Sofa Floral Cotton and adjusted in situ.
Year: 1810's. I've personally examined a very similar bib-front gown from the 1790's made of striped linen, and the primary inspiration dress is described as "1800-1810."
Notions: White cotton thread and 5 steel pins. (Pins are for closure.)
How historically accurate is it? I gave it an 8.5/10 on the HSF Facebook page. The fabric is not a great weight and the construction method is questionable. I made a lot of it up as I went along, consulting pictures for help. However, it's entirely hand-sewn and finished on the inside about a neatly as most of the originals I've seen.
Hours to complete: About 10. Most of the major time was spent on fitting the bodice.
First worn: Yesterday (March 23) to check the fit. I haven't worn it at all since I finished the hem, but I hope to remedy that soon! It rained all day today, ruining my planned photo op.
Total cost: The fabric cost... $1.00 per yard. Yes. Even including the exponential cost of thread and pins, I'm in under $4.00.


BONUS: Obligatory cat!

Monday, March 18, 2013

I almost named this post "The Weekly Wedgie #1."

No, really.

But then, I realized that even if the world needed another soul-wrenching weekly round-up of Blogger angst, it most certainly shouldn't been named in honor of a violent act of vigilante skivvy-yanking.

Then, there is the burden of irony in committing myself to weekly blog posts after a 3-week hiatus.

So! What's new? Well, for starters, there's this:


It's a petticoat! For the Historical Sew Fortnightly "Peasants and Pioneers" challenge, a.k.a. "#5." This petticoat is made like every other 18th century petticoat I've cobbled together, with the exception of hemming it to the correct length BEFORE attaching it to the waistband. This worked out pretty well and will hopefully mitigate *some* of the pathetic scrambling to shorten petticoats prior to wear each time I need one. I don't know about you guys, but every single petticoat I made in my first two years of attempting such things is waaaay too long. The worst of the lot actually touches my shoes. Yes. 


The material (woven cotton flannel) is folded prior to pleating, and attached to the waistband with the interior edges left raw. The waistband is made of Dutch linen tape from Wm. Booth Draper, and cut a bit shorter than I usually do. I decided to go minimalist on both tape and yardage in the spirit of the challenge, so the petticoat is of humble width as well(basically 88 inches). 

And here is a picture of our heroine, wearing the petticoat:

What can I say? It's been a tiring few weeks.

Those of you following the Dreamstress's challenge may notice that this is about a week overdue. The worst of it is, I finished this petticoat over six weeks ago just to use up the last bit of this fabric! It's been done that long. Grr! I didn't intend to use it for any challenge, but life intervened, as it occasionally does. My original intention was to make a pair of leather stays for the Peasants and Pioneers challenge, based on this pair in the Nordiska Museet that I've discussed before. 


I have the leather, linen tape and even a scrap of antique Swedish linen to use for the lining. The big hold-up? Those damned "bars of iron" stuffing the front channels. I naively believed that I would be able to find a few little iron bars quickly and easily.

BWAAHAHAHAHAHAAA!!!!

I have contacted virtually every blacksmith I can by phone within a day's drive of my current location. I found a guy about 45 minutes away who said he could easily do it, no problem! After three weeks of wasting time going back and forth, he finally produced steel bars. Steel is made of iron (in part), but it's not what was used in the original stays. All of this went down about a month ago, leaving me pretty much where I started. So that project has been put on the back burner again. Boo.

In other news:

* I gave another presentation on the Jehossee Exhibit and will be moving the lot to another museum in June. Jehossee lives on! 

* Spring Break was last week. And not a moment too soon. I spent mine doing absolutely nothing except fighting a sinus infection and avoiding responsibility in all forms.

* I also made this:


Into this:

Internal Hamdialogue: At least it's not cupcakes.

The child on the right is "Hambone" (with a cousin), beloved offspring of my awesome friend "Boobs." He had a birthday, as children are inclined to do, allowing me to indulge in my yearly tradition of staying up all night making a malformed edible tumor that vaguely resembles whatever he actually wanted. He then pretends to be pleased and I pretend that I am awake for the duration of the party. 

I've got a pile of Regency stuff on the "to-do" list for most of the immediate upcoming HSF challenges, and with any luck, I'll actually finish some of it on time. Along with a blog post or two, if I can motivate myself. I've been in a bit of a funk, and I'm starting to get on my own nerves. Hopefully, that can act as its own motivation. In the meanwhile, here's the challenge break-down:

The Challenge: Peasants and Pioneers (#5)
Fabric: Woven striped cotton flannel from Fabric.c*m
Pattern: None. 
Year: It's intended to be worn as an under-petti, so I'm planning to wear it with wild anachronistic abandon. However, the cotton material, flat front panel and inverted pleats in back put it best at the late 3rd-early 4th quarter of the 18th century.
Notions: Linen tape.
How historically accurate is it? I don't know of any American woven cotton flannel petticoats from the 18th century, so it's not based purely upon an original. However, Florence Montgomery's "Textiles in America" includes swatches of many similar materials. Entirely hand sewn with accurate seam finishes, though the hem at the bottom is generous for a petticoat. Personal rating: 9 of 10.
Hours to complete: About 4. 
First worn: This morning, over my head in the yard.
Total cost: Fabric was $4 a yard, tape was about $2 per yard... so about $16 total.  (The length of the striped material was about 3 yards, and I used all but 18 inches of it.)

Sunday, February 24, 2013

The B. in the Bonnet

The "B" will be me, of course.

I've gone and sewed some flotsam to a bonnet, an activity which required neither skill nor cunning. (And surprisingly little pre-meditation!) There's no need to beat a dead bonnet, so I shall endeavor to keep my punch-drunk, sleep deprived self on the modest side of the usual descriptive quagmire I write myself into!

Oooh. Did you read that last sentence? We're off to a terrible start. Best get this over with.

Some of you may remember the smug bit of rubbish I wrote last year about turning 30 and buying a bonnet. (And for those of you who don't remember, congratulate yourself on your excellent judgement! Or follow the link.) For the Fourth Historical Sew Fortnightly Challenge (embellish!) I decided that it was high time I decorated my lovely Timely Tresses acquisition.

Image courtesy of the National Trust Collections, who will NOT be made to photograph anything from the front, because that's just the sort of thing that got HRH Kate in trouble.

My inspiration was this c. 1840-1850 bonnet from the National Trust Collections. This particular bonnet was selected because the shape of my bonnet is nearly identical, and the time ascribed to the inspiration piece played wondrously into my devious little hands. You see, I wanted a bonnet I could wear at Civil War events without raising too much of a fuss, but something that could also conceivably be displayed with the Jehossee Exhibit if need be. A Time Lord of bonnets, if you will.

The middle of the nineteenth century is not a great time to decide you want a chapeau that will accommodate a 15 year time span. But a Thread-Head's gotta do what a Thread-Head's gotta do.


I started the embellishment process by rounding up a piece of scrap silk that was too small to do anything else with. (It is actually too small for this project as well, but who needs to actually TIE their bonnet strings?? NAME ONE PERSON. That's what I thought.) I cut the silk into roughly 4" strips with the pinking shears I never use, and began pleating the fabric inside the brim.


The pleats are not precise. Frankly, if the surviving examples are any indication, bonnet trimming was a brutal, haphazard sport in the Antebellum era. (Some of them look as if the ribbon was applied with a cannon.) The silk I used is not remotely starchy or crisp, so I was forced to accept a certain... draped quality to the pleats.


I used pretty much every needle I own at some point in this process. It was ridiculous.  I started with my weapon of choice, a #12. That was tough going, so I ended up with the beloved vintage darning needle. That was a bust too, which ultimately led me down the rabbit-hole to a needle that I have no other earthly use for: a book-binding needle. Blunt, solid, short and possessing an eye commodious enough to house a family of four, it was the last thing that I thought would work. (Hence, why I tried it last.) But it was great! The blunt tip spread the fibers of the straw rather than stabbing through them, and the large eye protected the thread from the ravages of the straw. Who knew?


My bavolet is precariously created from the very last scraps of 4" silk that I'd cut. The chain-stitch across the bottom is H.U.G.E.... but so is the design on the original. Historical relevance for the win! 

Regrettably, my photo documentary ends here abruptly. After attaching the bavolet, I ran another row of stitches across the front frill of silk, roughly 1.25" from the pinked edge. It was the only solution I saw to a dreadful case of Flaccid Silk-itis. (When the bonnet was on, I looked like I had upholstered Zooey Deschanel bangs.) Then, in the manner of the Romans, I threw crap all over the bonnet until it could take no more. When at last it was full, I threw even more crap at it. Then I sewed the crap to the other crap. 

I've never felt more alive.


I then dragged it to the Archives and stuck it in a display case as part of the Jehossee diplay. Since it's living in 1850 at the moment, I tried to play up the horizontal look of things rather than the vertical. That said, I failed to get a single decent picture of the bonnet on a human head post-production. The stuffed head above does a lovely job of supporting it, but cannot provide the proper foundation of 1850's hair.

These pictures were taken after the bonnet was put on display and they were all taken from the outside of the case. Brilliant, yes, I know. *Sigh.* Why must I be merely beautiful instead of organized?


In addition to the saffron silk, I used cotton embroidery floss, felt pussy willows, wax blueberries, and some lovely blue plaid ribbon. The plaid ribbon was culled from the $1.00 bin at Micheal's (our local branch of a semi-national craft chain). It is not a natural fiber ribbon, but desperation won the day. Plus, I really love the ribbon.


And Huzzah! Blammo! Bonnet!


Hats Facts:
The Challenge: #4: Embellish!
Fabric: A 15" by 30" piece of saffron colored silk.
Pattern: Are there patterns for things like this?! None used. Images of extant bonnets were consulted.

Year: 1850-1865. (But really, I'll take any combination of those years. Right now we're going for 1850-1855.)
Notions: Yes!  This was the Big Show for notions. I used: 
3 kinds of thread! (cotton embroidery floss plus yellow and brown cotton quilting thread.)
Ribbon!
Wax blueberries!
Felt pussy willows!
Pinking shears! (They deserved a second mention.)
How historically accurate is it? With the exception of the VERY inaccurate blue plaid ribbon, everything else used is at least plausible. When I find appropriate replacement ribbon for the blue plaid, it can be changed out. I'm giving this one a 9 of 10.
Hours to complete: 6ish. 
First worn: I had it on several times after it was finished, just for fun. It has not been worn with historical intent at all, though it is currently on display with Antebellum clothing. Did we ever decide if that counted?
Total cost: The bonnet was an initial investment of $85, I think. I purchased the blueberries and pussy willows on sale over the course of the past year. I wouldn't have paid more than $3.00 per pick, so the lot comes to $6.00. Blue plaid ribbon was $1.00. Everything else was stash stuff. Roughly $100, if you count the shipping on the bonnet when I bought it.

Sunday, February 10, 2013

My Lovely Lady Rump.

Just in time for the Historical Sew Fortnightly Challenge #3, I've produced this, a rump.


Majestic, no?

I didn't really think about making a rump for this challenge until I was trotting about in my super pretty gold gown last week and I realized that the shape and relative weight of my current rump wasn't quite getting it. My old rump (oh, how I love those words...) is made of the same pink sprigged cotton duck fabric, but tightly stuffed with rags and sawdust. At the time I made it, 10 pounds of rags and sawdust sounded like a GREAT idea because the hip pads I made four years ago (stuffed with a meager assemblage of bamboo and cotton fluffer-stuff) have slowly deflated like a popsicle in a frying pan. The old rump worked well, but it was bloody heavy.

 The new rump by night. Oooooh, baby.


There comes a time in every woman's life that she questions the wisdom of appearing in public burdened with what feels like most of a corpse tied around her waist. So I needed a new, lighter rump. My mother had given me a wonderfully busted old chair a couple of years ago as punishment for being such a disappointment as a daughter. (This is an assumption based on the relative hideousness of the chair. Hi, Mom!!!) During a particularly misguided bout of craftiness, and largely inspired by the success of RabidGlow, I pulled the chair apart with the intention of re-upholstering it.* I used the discarded padding from the upper back of the chair to stuff this rump. I suspect it's some form of poly/wooly/cottony blend but I have no idea. Its lightweight, it was handy, and it has maintained its original shape for more years than I've been alive.

* Yeah, freaking right.


The shape was dictated by a non-specific idea I had about what I wanted it to feel like more than what I wanted it to look like. (I was very inspired by some of the images in the excellent article that was presented on Démodé recently, too! Serendipitous timing.) This is a terrible way to do anything, but there you have it. Other than that, the fabric really had the final say in shape. I only had a small bit left of the cotton duck, and I wanted to make the biggest rump that I could. (Don't we all?)

 Closing the deal. I have made So. Much. Stuff. out of this fabric. It has integrated itself into the two rumps, a pinner apron and the lining of a half-finished coat. I think this is officially the last of it, though.

The seams are all back-stitched for strength. A 30" length of cotton tape was used as a waist tie, threaded all the way through the rump. I quilted 4 channels through all of the finished layers for the characteristic "puffy shell" look seen in 18th century caricatures. That was ultimately the most time-consuming part because I initially thought that I could sew through 4" of puff with a 3/4" needle.


 And we have rump! Rumpus Rumpus! The pink ribbon is not a permanent fixture. I didn't like how boxy the shape was when it was finished, so I tied the ribbons down tight to help round it up a bit. But then, I really liked it so I've decided to use some slightly less plastic-y ribbon on it when I find the right stuff.


In complete defiance of my lifestyle, moral code, spiritual beliefs and genetic proclivities, I finished this thing well over a week early. I know, I know. Something must be wrong with me. I'm looking into it. It was a tender mercy though, because I needed it. I spent part of the past week putting the Jehossee exhibit is back up at the university archives and I needed all the padding I could get for those blasted mannequins. Above, you see the rump already pressed into service to augment the abruptly interrupted charms of the mannequin I dubbed "Assless Boobs On A Stick." (If you don't get it, follow the link. Unless you don't want to get it, in which case you are probably too classy to be reading this. Go you!)

Something new I'm trying. It looks like an 8th grade science project, though. Hmm.


The Dastardly, Deadly Dull Facts:
The Challenge: #3: Underneath It All
Fabric: My last little patch of yellow sprigged cotton duck.
Pattern: None. I referenced a few illustrations and the truly awesome post that Démodé recently published.

Year: 1780-ish is the intended use, but it's currently sitting nicely under an 1850 gown. It's a full-service rump.
Notions: Yes! Finally! I used a 30" bit of cotton tape threaded all the way through it as a waistband. That is totally a notion. The ribbons count too, I suppose.
How historically accurate is it? What to say? It's a functional butt cushion. Accuracy wasn't as big of a concern here due to my desire to have something more practical than strictly accurate. However, it's sized and shaped similarly to several original rumps (as seen in illustrations). The stuffing is highly suspect, and I have no way of verifying the use of cotton duck for rumps. I'll give this one a 5 of 10 for those reasons.
Hours to complete: 3. It could be done in half that, but it took me ages to figure out to use a larger needle for the quilting.
First worn: About a week ago for fitting purposes. However, it has been proudly installed under a cotton dress and petticoat for several days, so technically it's in use now.
Total cost: Zippo Nano. And MAN does it feel good to use up these odds and ends!